
This article will explain how to automatically set Resourcing in Projectworks by creating meetings in an Office 365 calendar.
There are a number of ways to connect Office 365 to Projectworks through Zapier. This guide will show you how to setup a connection so that when a new calendar entry is added in Office 365, the number of hours associated with the meeting is added as resourcing in Projectworks.
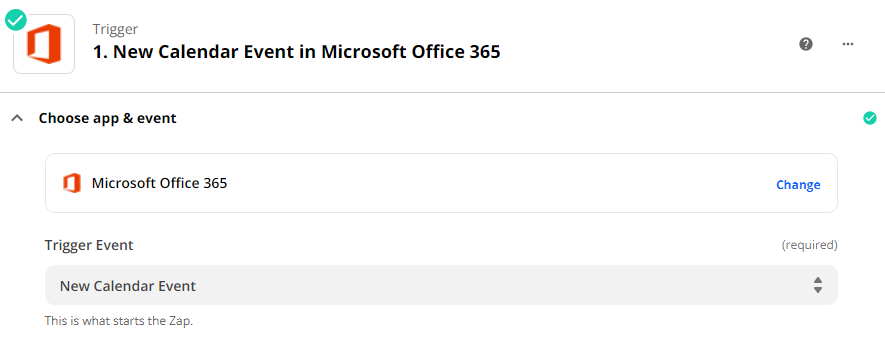
Step 1: Setup the initial trigger
The first step is to create a new trigger that will fire when a new calendar event is created in Office 365
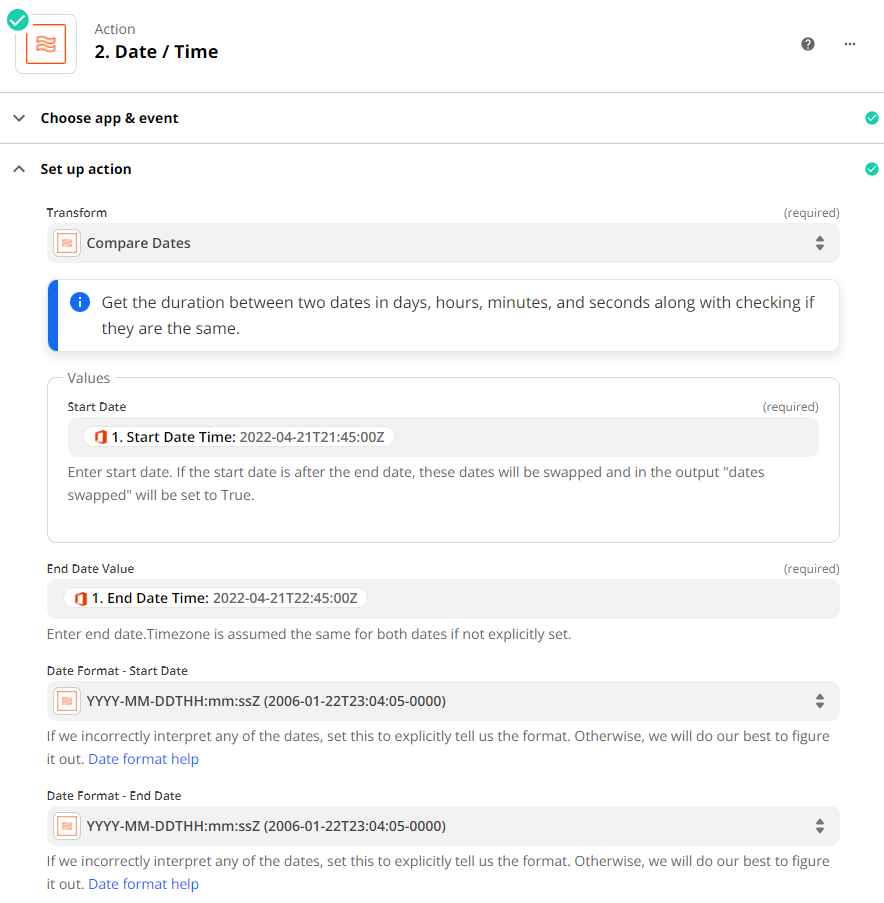
Step 2: Get the meeting duration
This can be used through a Zapier Date / Time action. We want to compare the start date time with the end date time so we can calculate the meeting duration. Make sure you also set the formatting to be the same formatting used by Office 365.
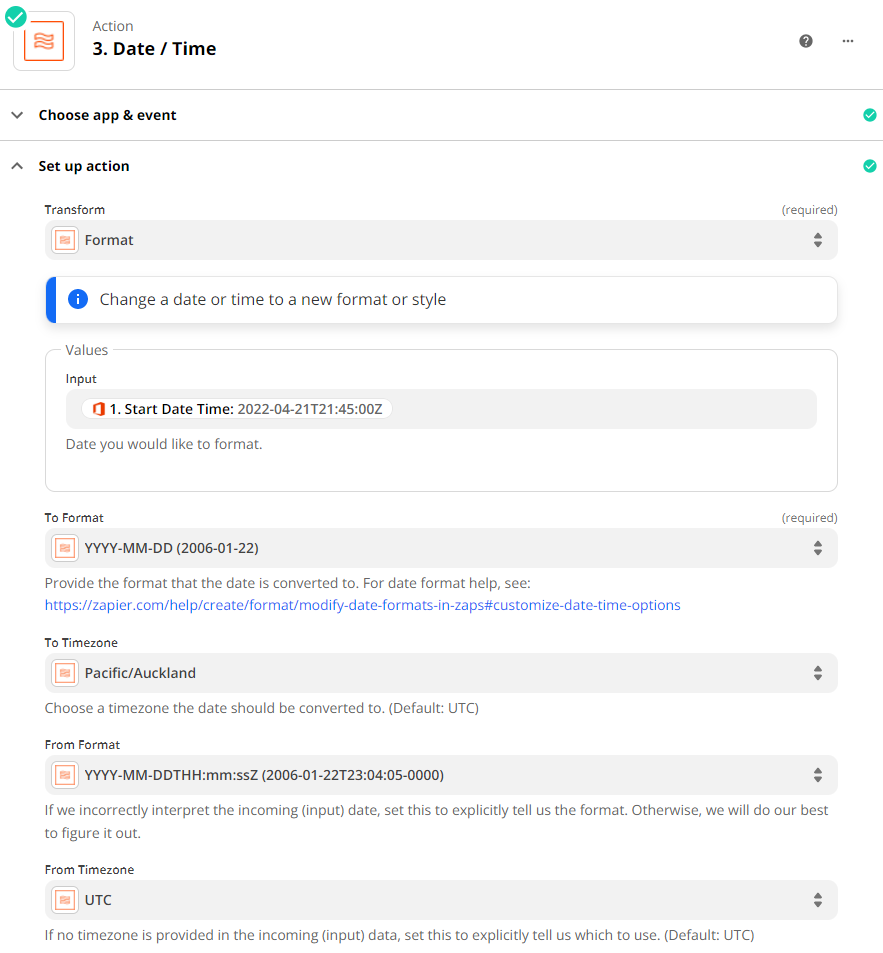
Step 3: Format the date
We need to format the date and convert the time zone from the format / zone used by Office 365 to something suitable for Projectworks. First of all, in Projectworks we only need the date portion as the resourcing is just set for the specific day, set the to and from formats as displayed below.
Second of all we need to convert the time zone. In our testing it appeared that Office 365 dates are stored in UTC so set the from time zone to UTC. You can then choose the to time zone to suit your needs.
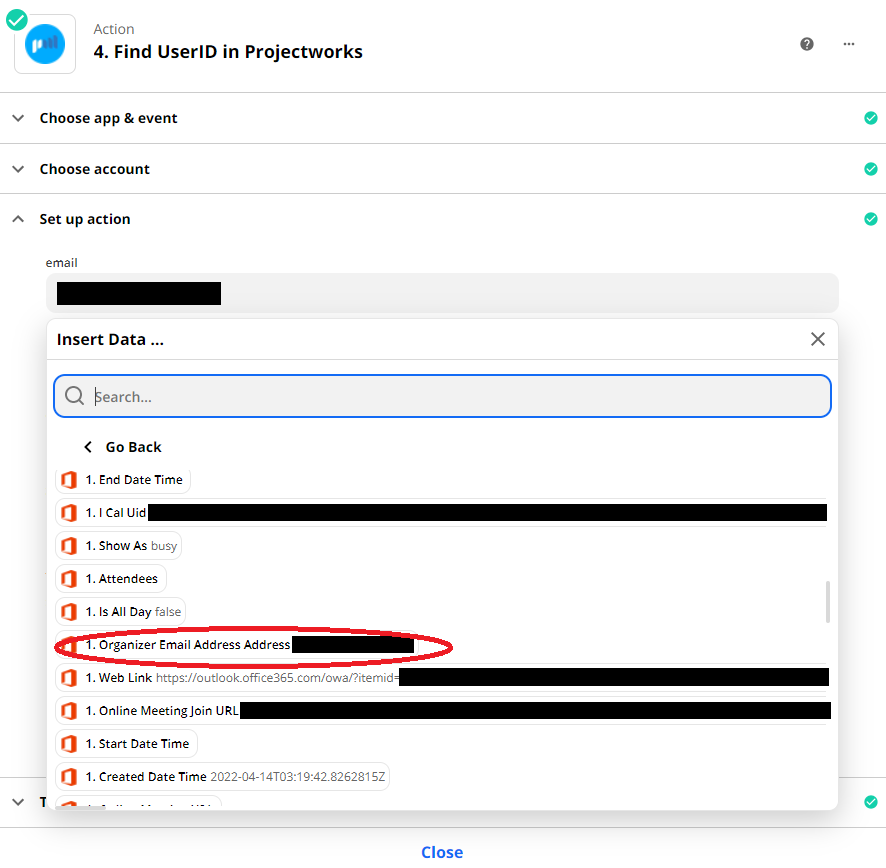
Step 4: Lookup the User in Projectworks
Use the Projectworks Find UserID action event to find the correct user. You can either hard code the email address to your own, or derive it from the Organizer Email Address field from the meeting request.
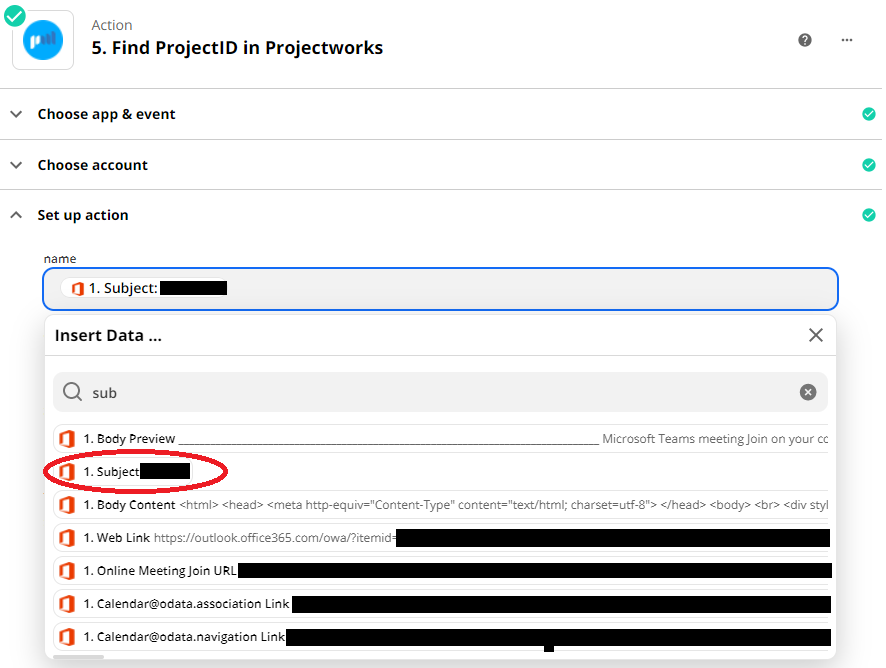
Step 5: Find the ProjectID in Projectworks
How you map which project to resource against will depend on your own configuration, but one way to do it is to do a project name lookup based on the subject of the meeting. This will then find a project with the same name as the meeting subject. You may want to add your own additional levels of sophistication here.
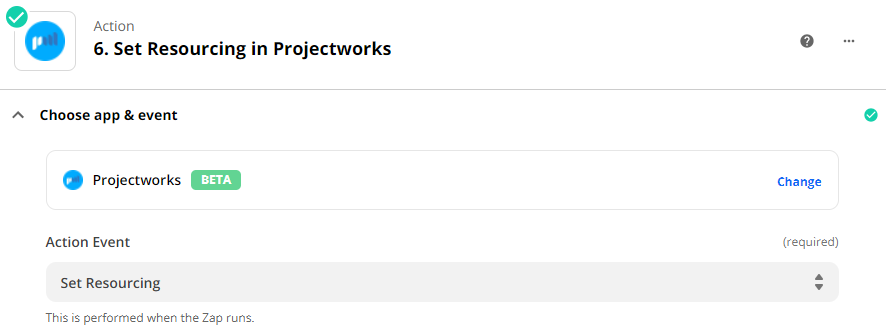
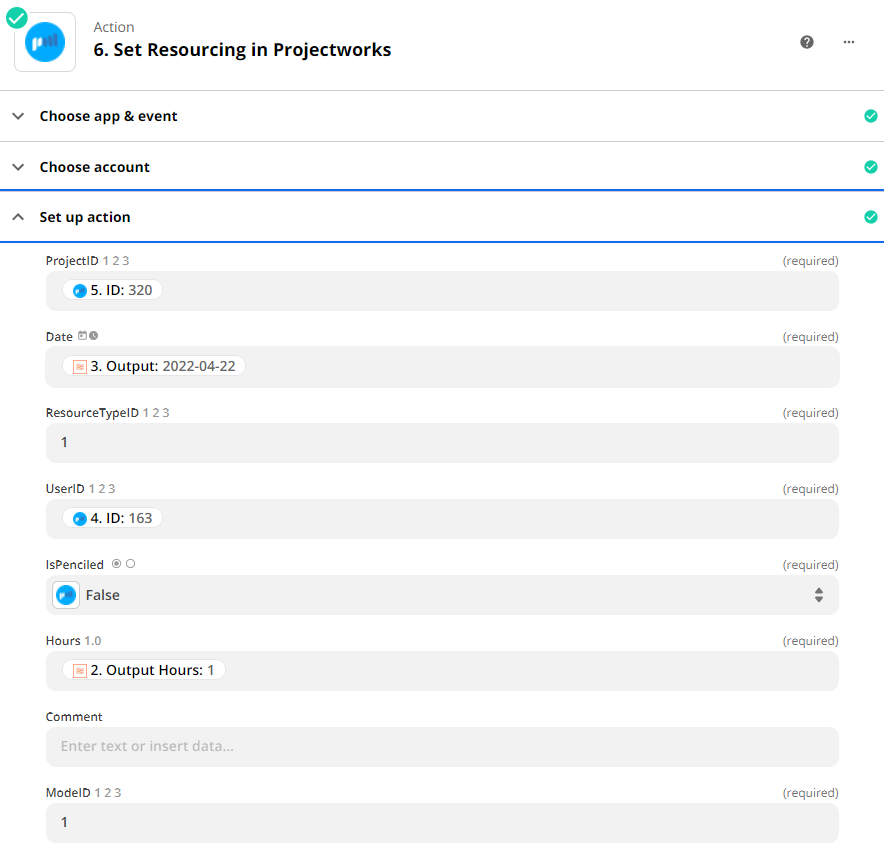
Step 6: Set the Resourcing
You can then add a Projectworks action to Set Resourcing
- Set the ProjectID to the ID that was returned in Step 5.
- Set the Date to be the outputted date from our formatter in Step 3.
- Set the ResourceTypeID to be 1 (This denotes a real user, not a shadow).
- Set the UserID to be the ID returned in step 4.
- Set Penciled to either false or true.
- Set the Output Hours to be the hours returned from our formatted in Step 2.
- Enter a Comment if required.
- Set the ModeID to be 1 (this denotes a Daily resource)
You may want add your own additional logic to further enhance the process.